One Room Challenge Week 3: Wallpaper
It’s week three of the One Room Challenge with Better Homes and Gardens and this week I’m putting up wallpaper! Check out all the rest of the week three progress here.
As the self proclaimed queen of peel and stick wallpaper, using traditional pasted seemed like a daunting task. My first house had LAYERS of wallpaper that I had the worst time removing so the thought of applying it was nerve wracking.
Belarte reached out to me and offered to send me one of their custom wall murals for my son's room makeover and I thought this would be a good opportunity to face my fear and give it a go.
Materials:
Primer
Wallpaper
Wallpaper paste
Smoothing tool
Utility knife
Level
Damp sponge or cloth
Step one is to prime the wall for proper adhesion. Most wallpaper paste is not compatible with latex paint so it’s always best to prime to give it a nice surface. Also make sure to smooth any areas that may have had nail or screw holes. Let the primer dry for at least 2 hours.
Next up, I drew a plumb line from the ceiling to the floor- meaning, I measured the width of the wallpaper, measured that distance out from the top of the wall, then used a level to draw a straight line all the way down. The purpose of this is to make sure that your first piece goes on perfectly straight since not all walls and ceilings are level and straight.


This wallpaper is super cool because it is printed specifically to your wall measurements. You unroll the paper, cut where it directs you to cut and go in order of the number printed at the top of the strip.

The Belarte wallpaper rolls come unpasted so I bought Roman Pro-880 strippable wallpaper adhesive. I applied it with a brush but you can also use a roller. You want to be sure to get it into all the corners and edges so that it will stick properly.

Apply enough paste for your first strip, then place the strip by lining it up with your plumb line and using your smoothing tool to gently smooth the paper into place. Use your damp sponge or towel to wipe off any excess glue.
Then move on to your second piece. Line up the pattern and apply the same way, smoothing and wiping off excess glue.
When you get to an area that you need to trim around, like a window, I found that the easiest way was to smooth the paper all the way over to the trim and use my straight edge and a sharp utility knife to slowly cut around the window. This was arched so it was a bit tricky, but I just cut the straight part first and then slowly smoothed and cut around the arched top.

As I worked, I found that this wallpaper and paste was much more forgiving than peel and stick when I needed to move things around.

To cut around an outlet, you cut an x into the paper across the top, then just use your straight edge to carefully cut around the space.
Lastly, use your straight edge and blade to trim off all excess wallpaper on the top and around the baseboards.
That's it! It was seriously so easy and I couldn't believe I was so nervous. It was so much easier to work with than peel and stick.

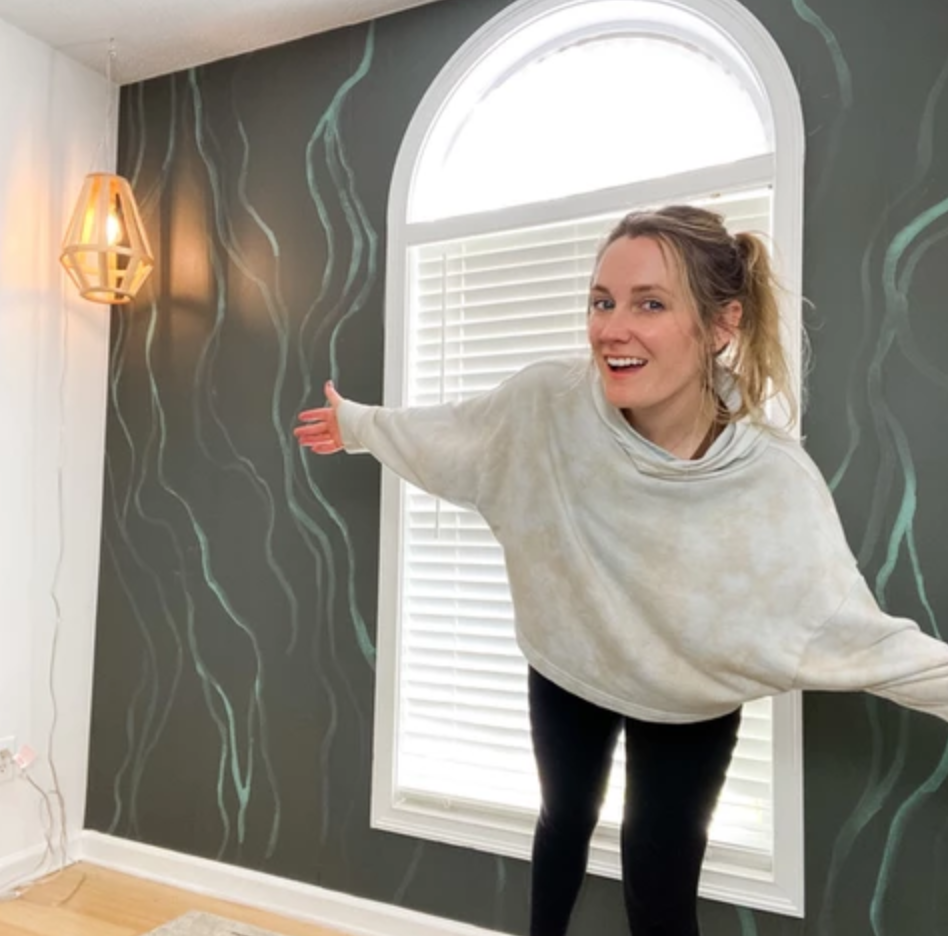
Now, down the road when I decide to remove it, I may be cursing myself, but I'll deal with that when I get there. For now, my son is so happy with the mural he chose and I'm happy that I got to try something new.
Love,