One Room Challenge Week 8 Finale: From Boring to Beautiful and Functional
* this post includes affiliate links. Any clicks are appreciated *
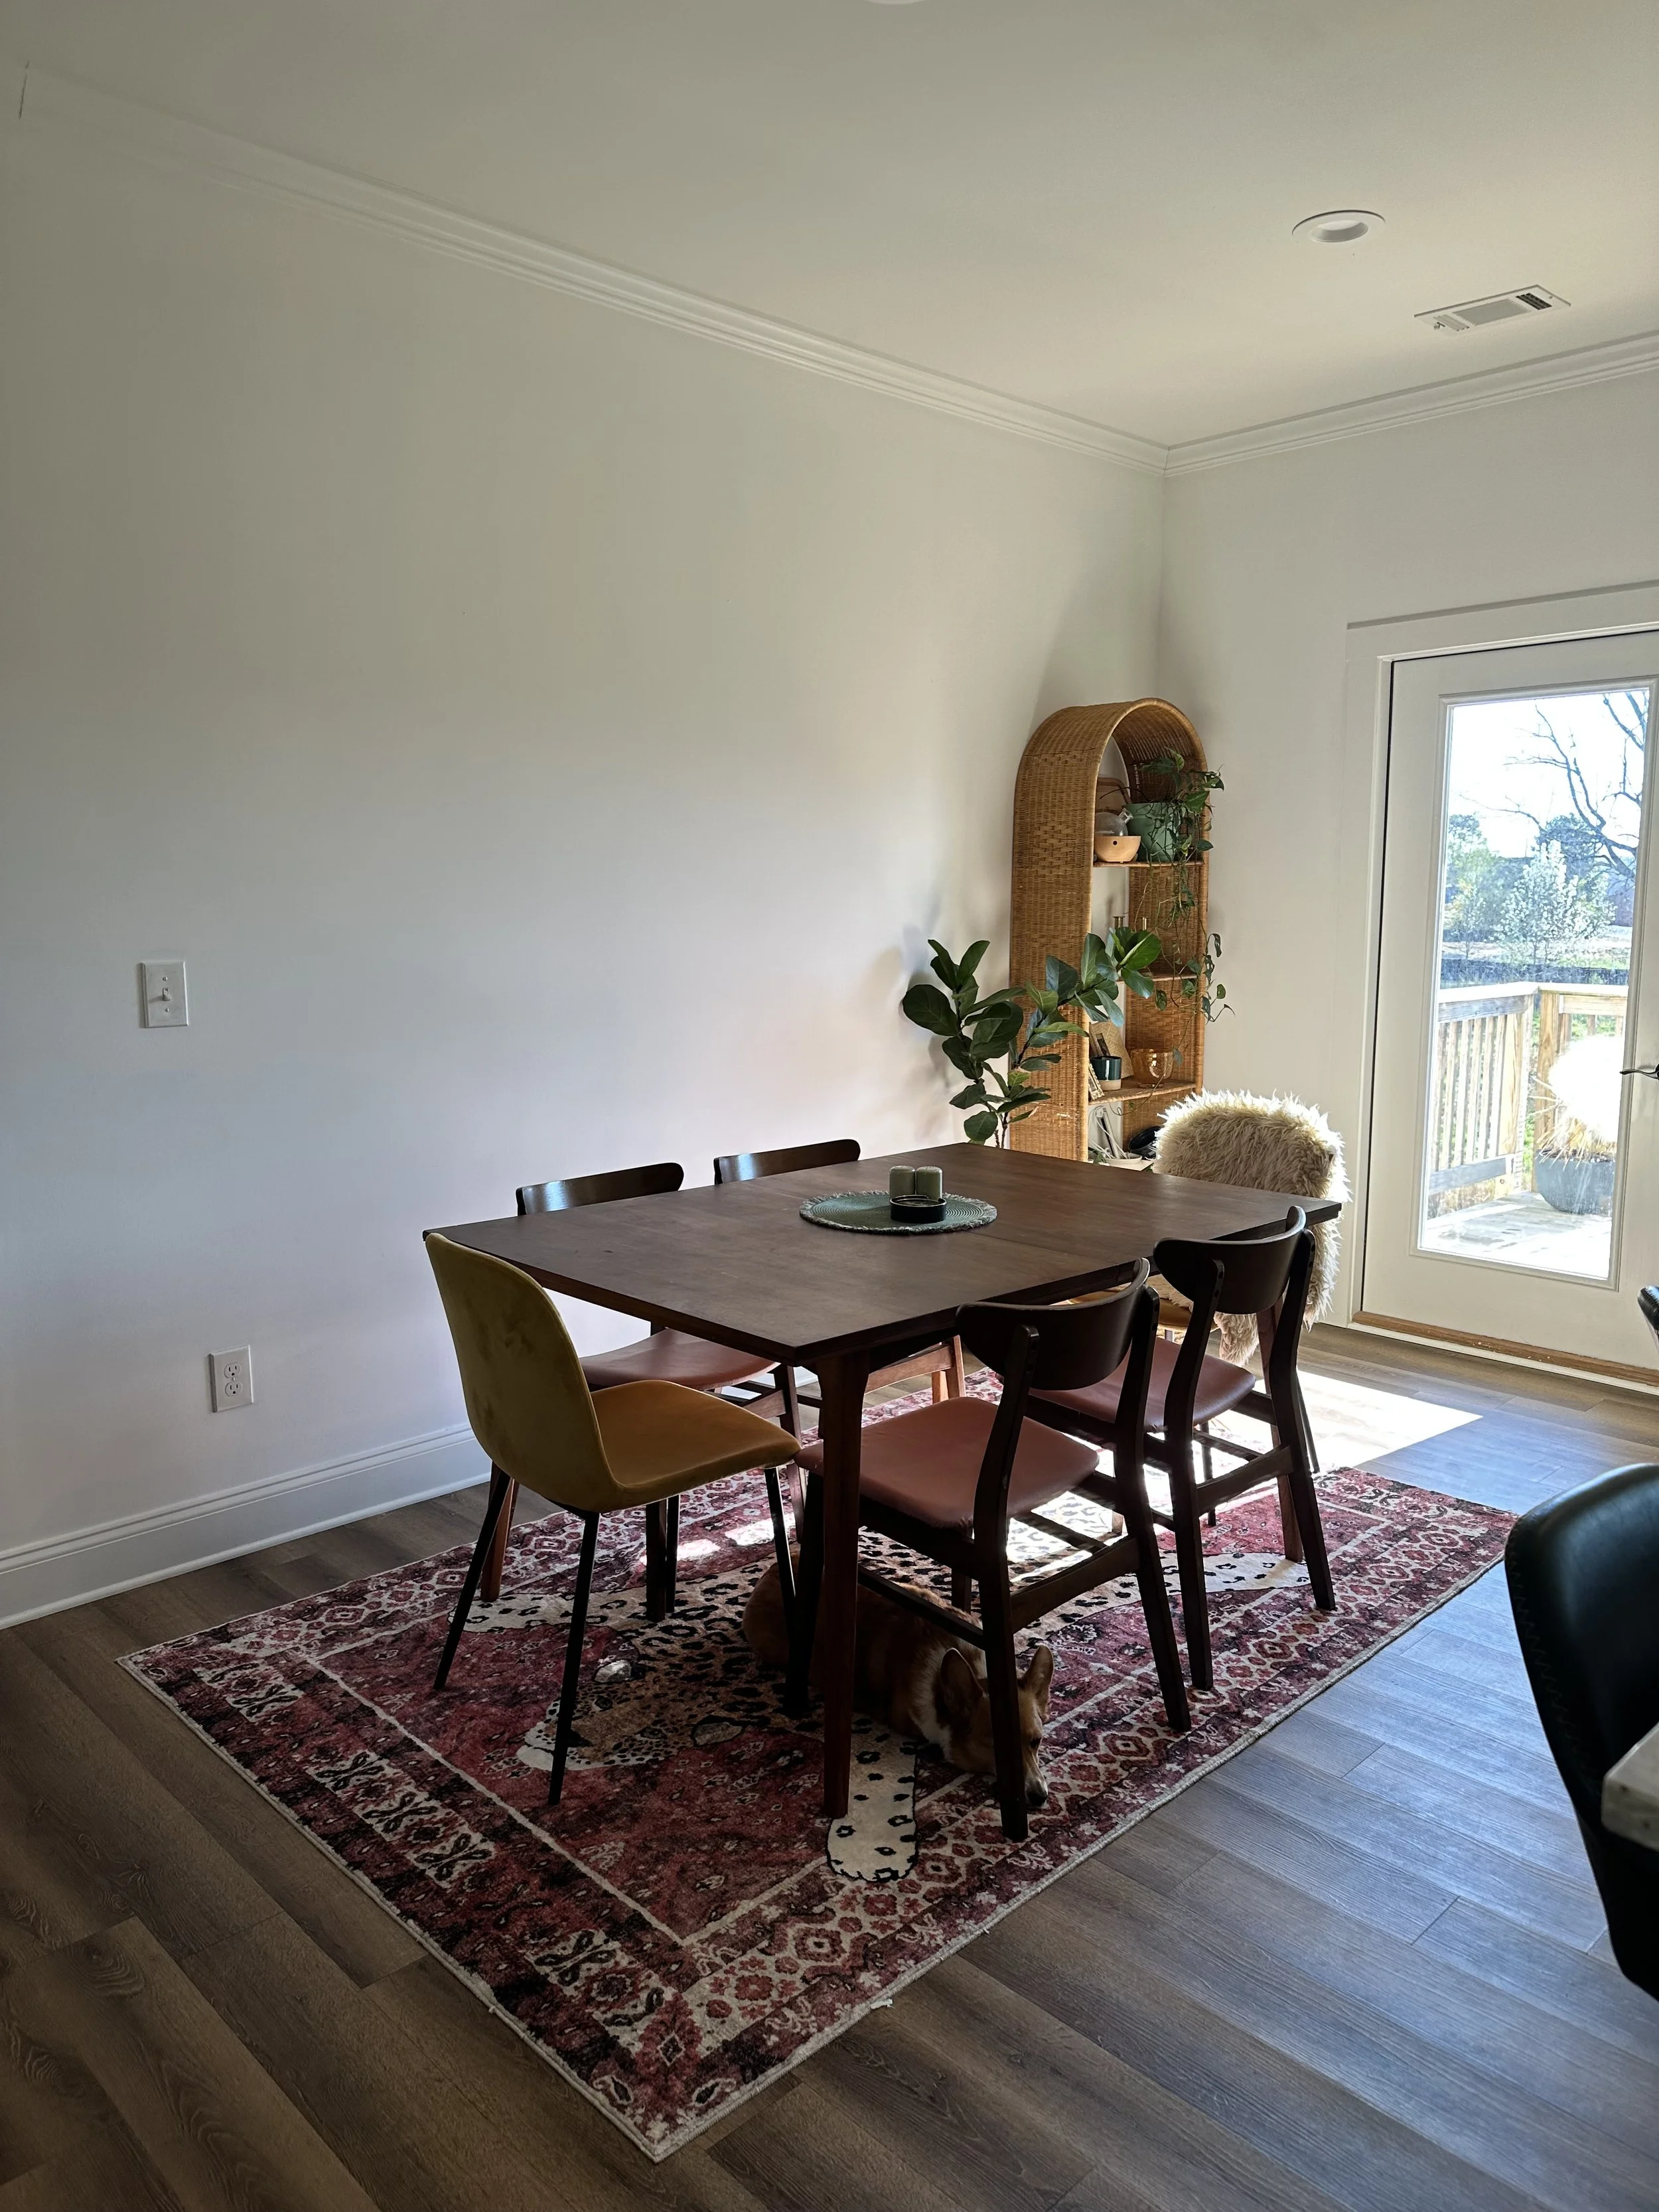
Week 8 of the One Room Challenge x Apartment Therapy is here, and this dining room has officially gone from “meh” to magical. It’s been a whirlwind of IKEA cabinets, cushion chaos, wallpaper drama, and plenty of late nights fueled by creativity. But after all the sawdust and second-guessing, the result is everything I hoped for and more.
QUICK RECAP and a reminder of where we started:

Week 1: The Vision
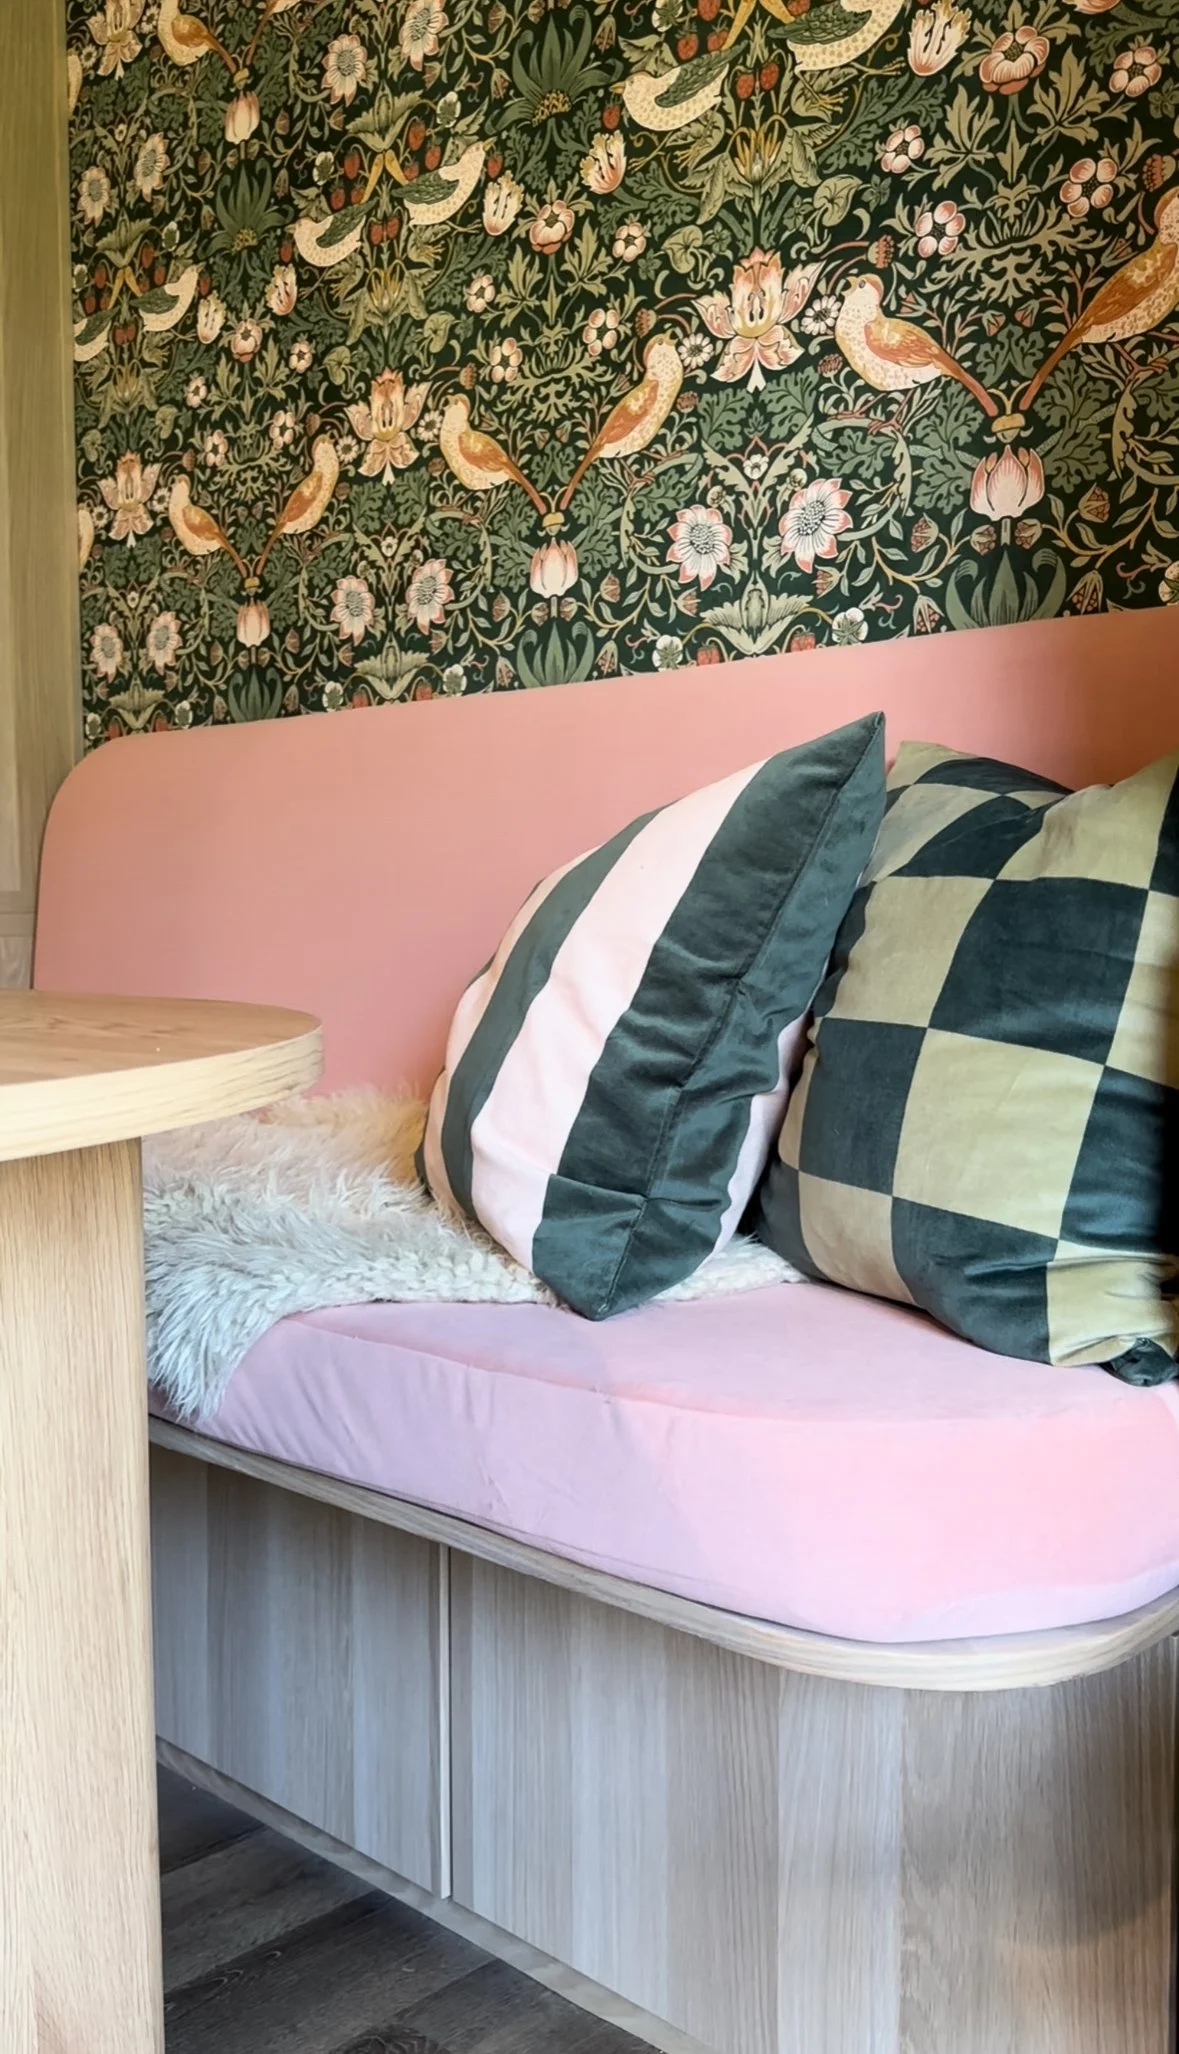
In Week 1, I shared my vision for transforming our dining room into a functional and stylish space. Since moving into our new home in October 2024, I’ve been updating one space at a time to make it feel more like “us.” The dining room had tons of potential but needed smart storage solutions and furniture that better fit the room’s dimensions. Key updates included adding Ikea Besta shelving, building a custom banquette bench seat, swapping out our rectangular dining table for a more space-efficient oval table, and incorporating colorful wallpaper to add personality to the space.

Week 2: Assembling the Besta Cabinets
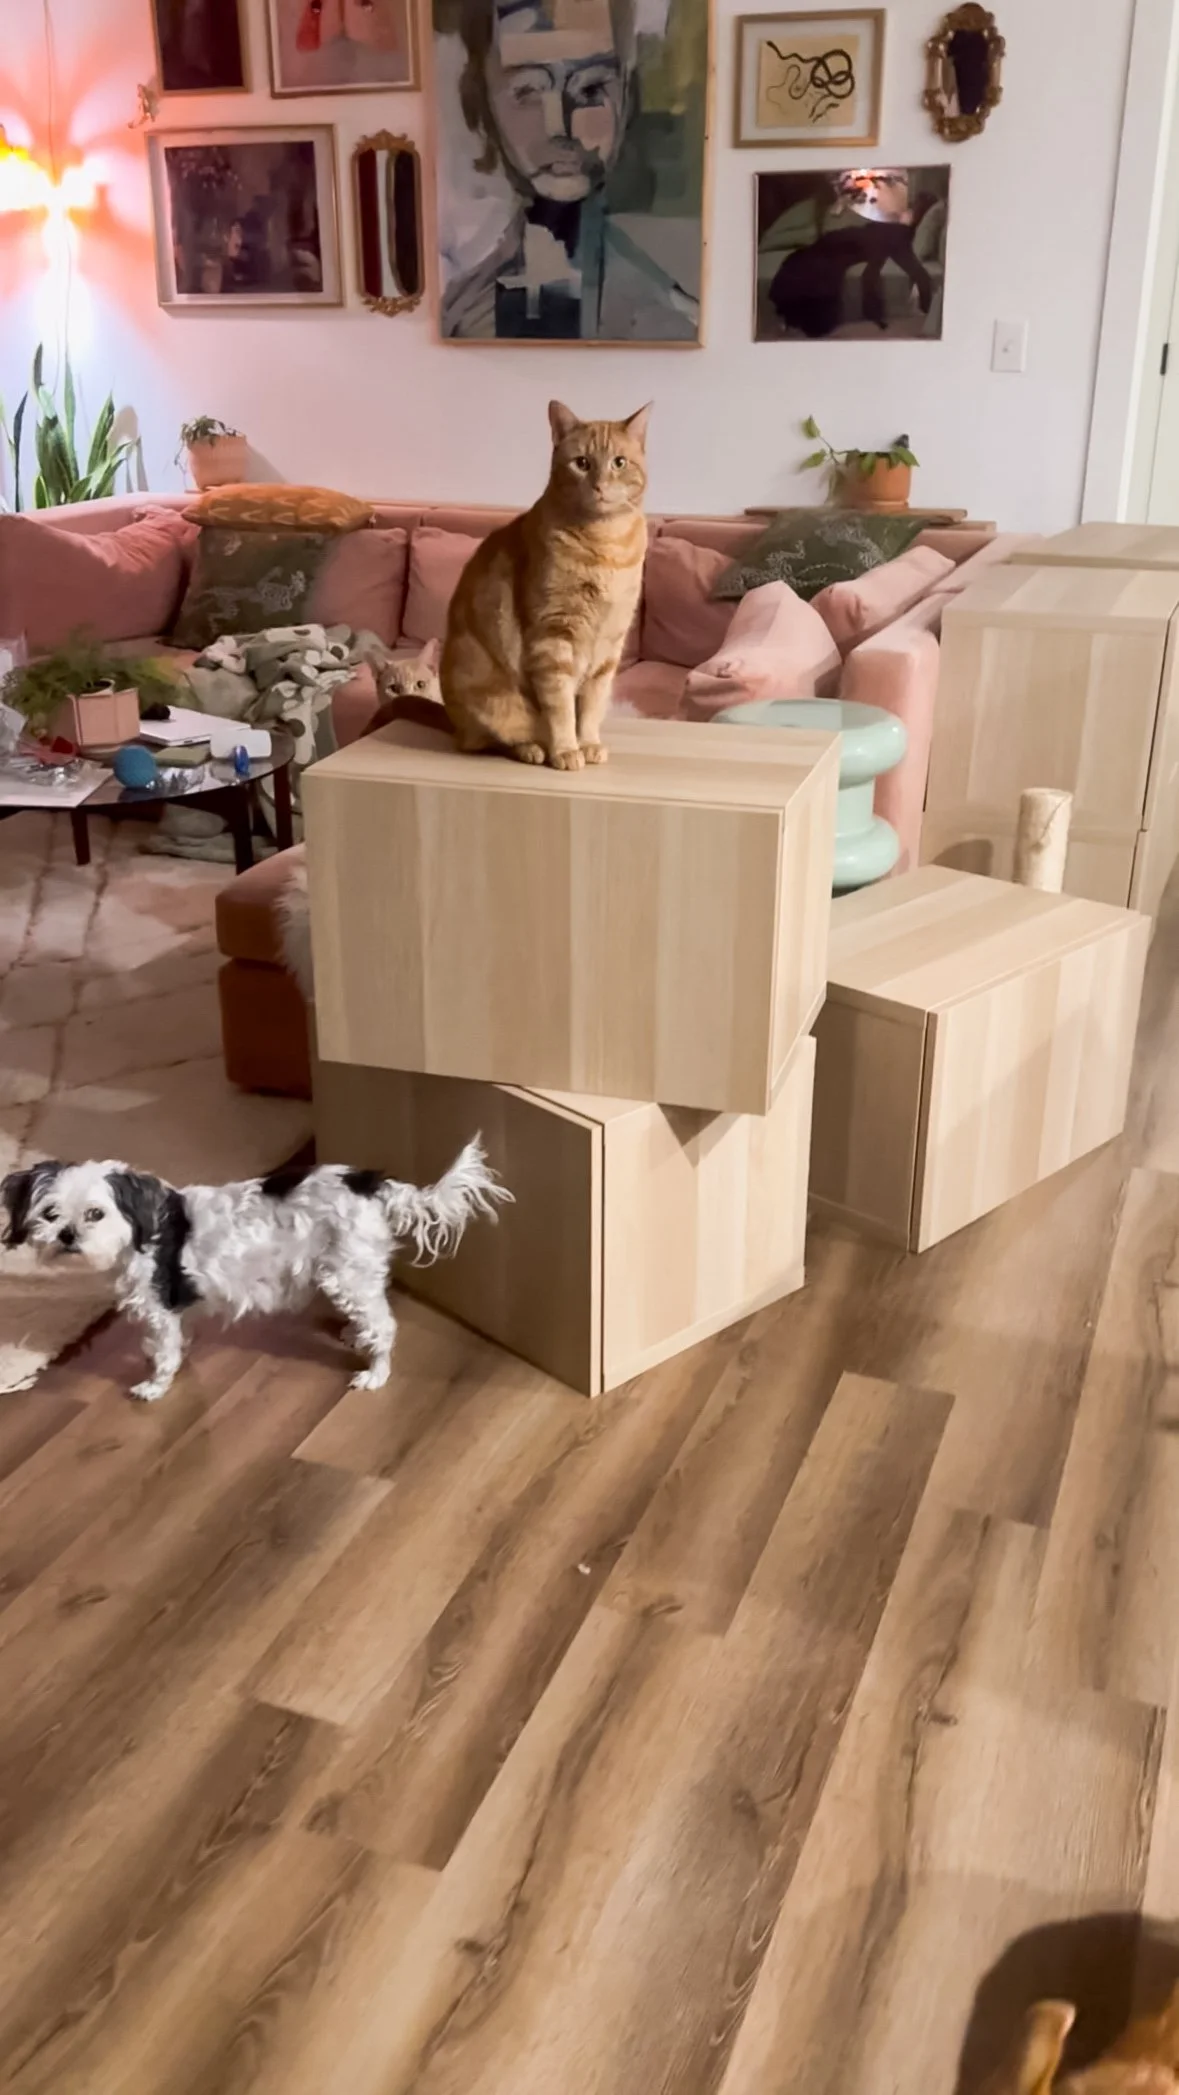
Week 2 was all about assembling the IKEA Besta shelving units. Despite a busy schedule, I managed to put together these units, which will add much-needed storage and bring a modern, sleek vibe to the space with their white oak finish. The goal is to hold dining room essentials and display items like art and plants, keeping things organized while adding character to the room.
Links:
Week 3: Building the Base Frame
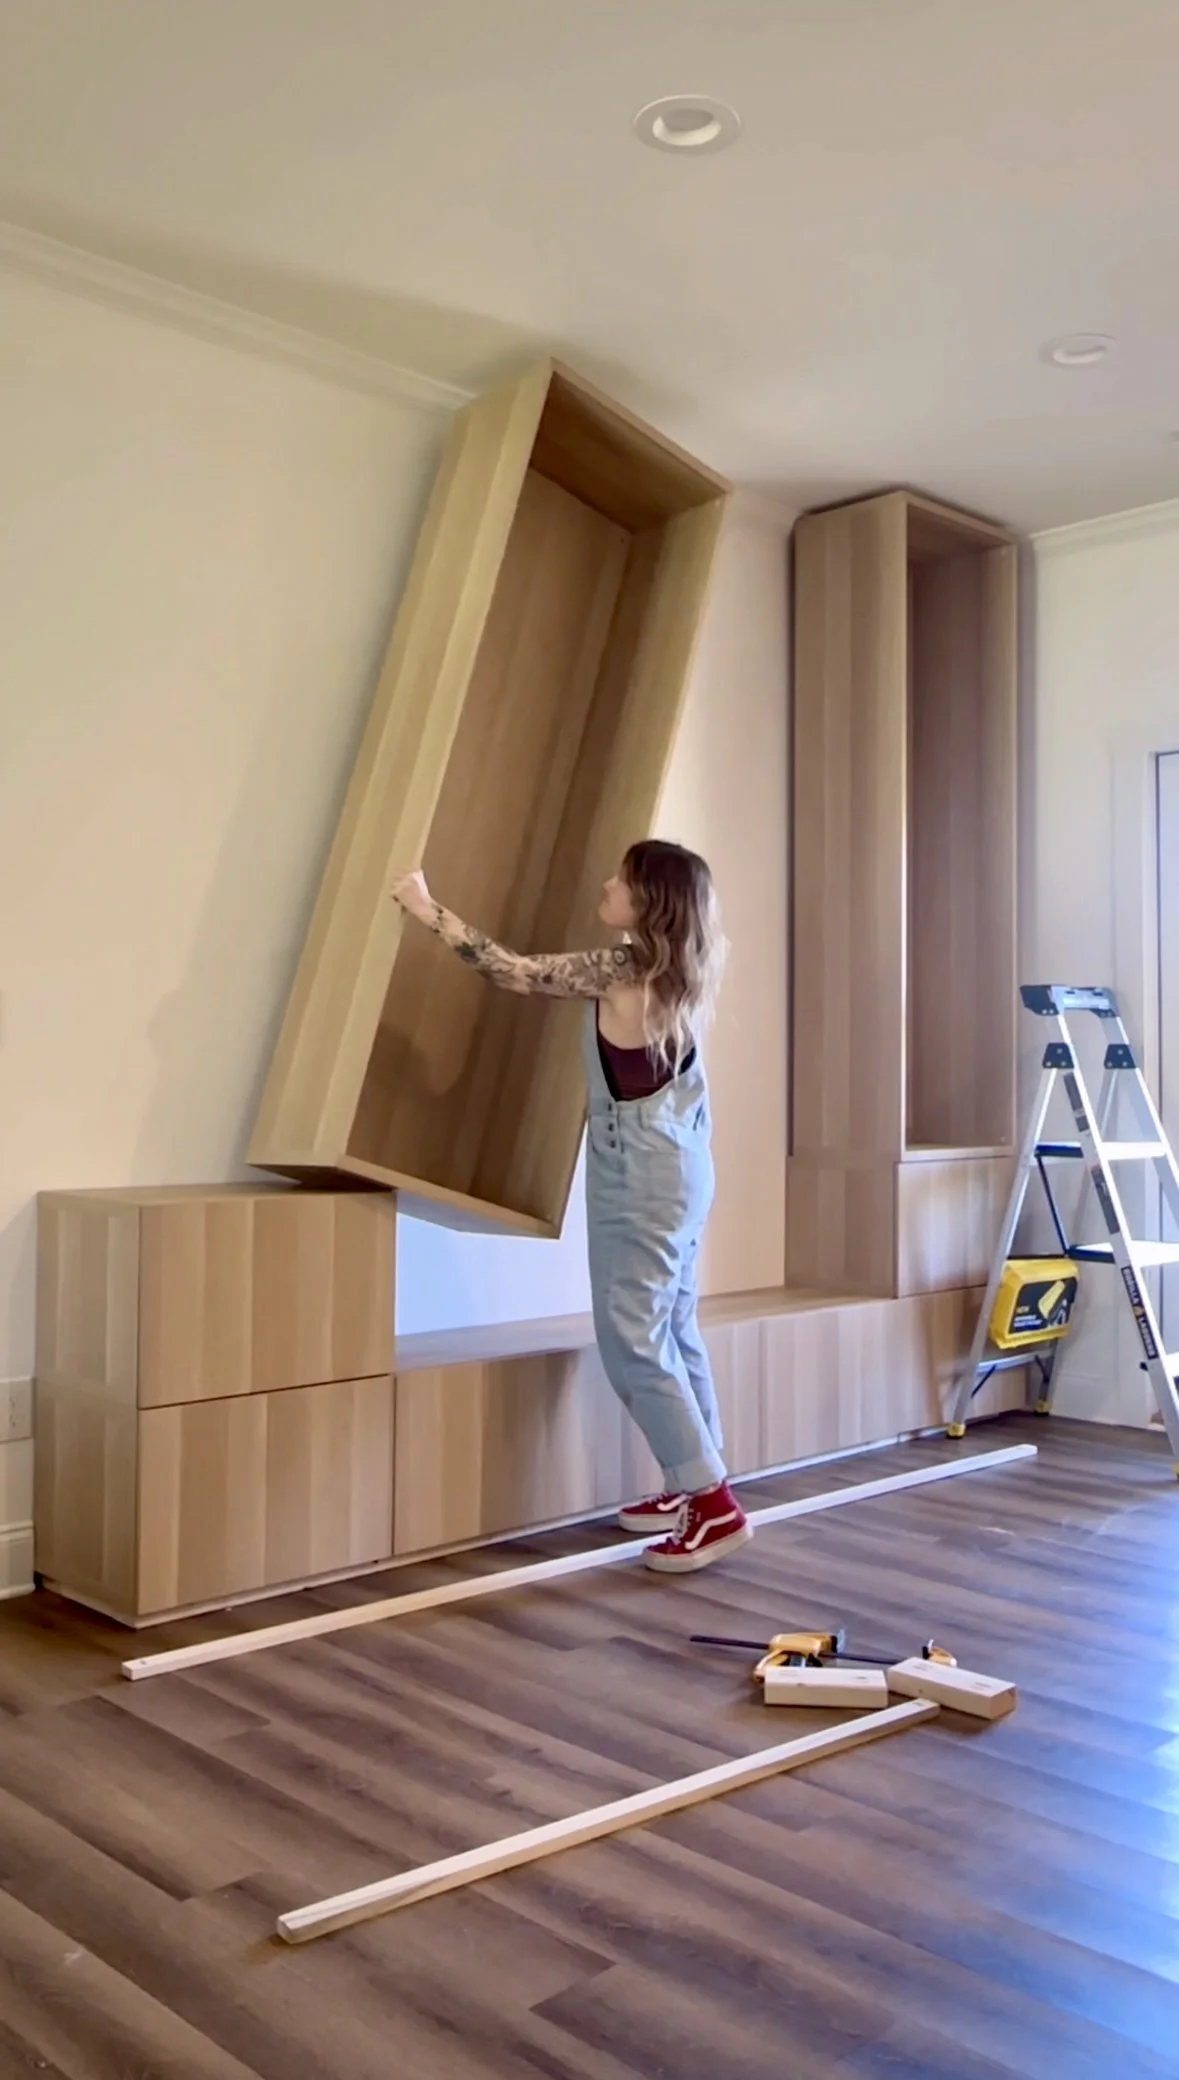
In Week 3, I constructed a custom base frame for the IKEA Besta cabinets using basic 2x4s. This added support and height, giving the cabinets a more built-in and substantial look. I also installed the larger shelf portion on top and added 1x2 trim to the bottom of the base, along with scrap plywood to the top of each shelving unit. These small details instantly elevated the cabinets, making them feel like a built-in feature.
Week 4: Building the Bench Seat
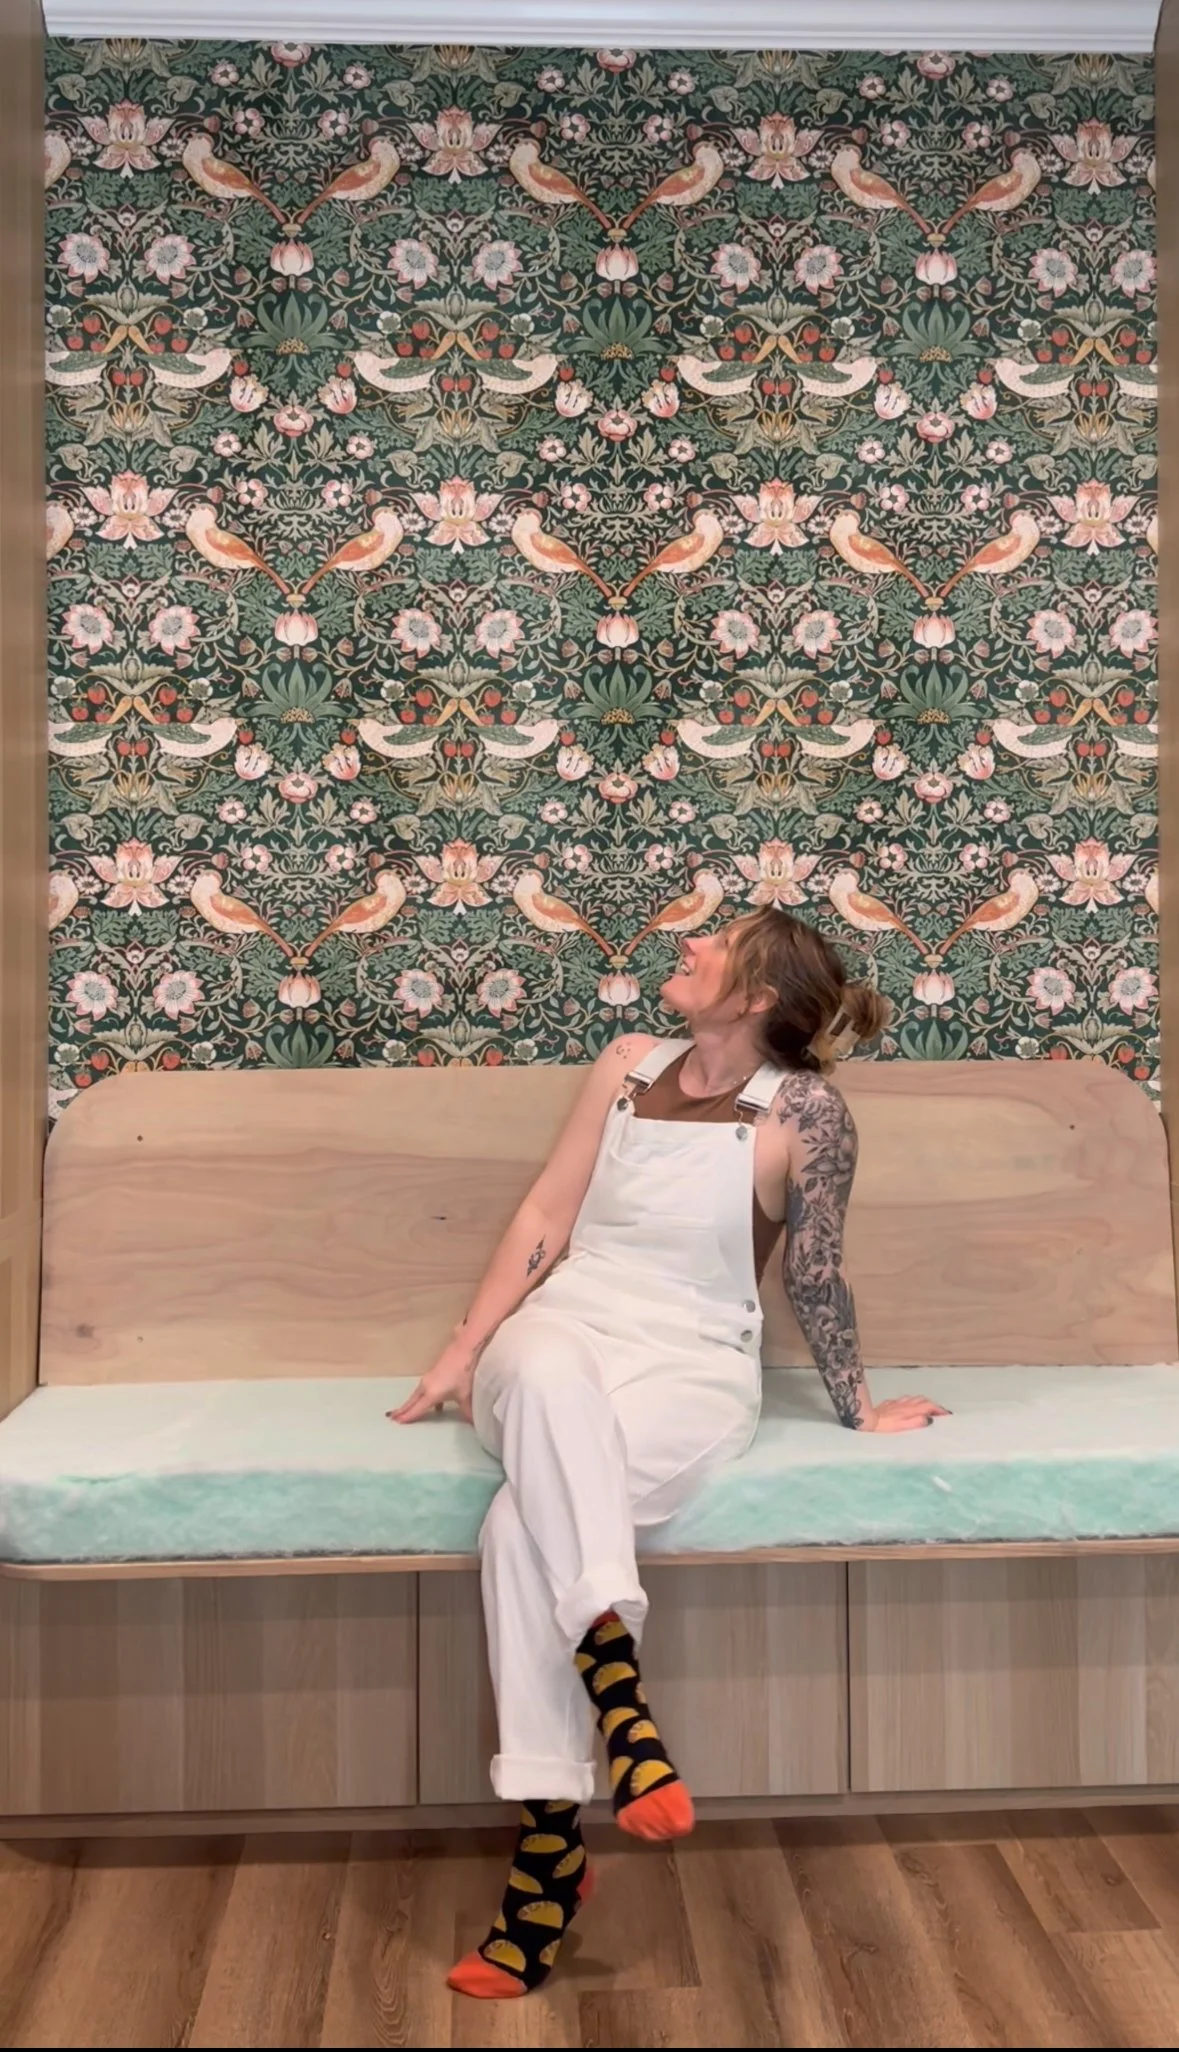
Week 4 focused on bringing the bench seat to life. I used red oak plywood for the seat, cut down to size, adding edge banding to the front edge and staining it with Varathane’s Hazelwood. For the backrest, I cut a 2x8 panel to size, angled the bottom edge for comfort, and supported it with angled 2x4s. I hung the backrest using a French cleat system, ensuring it was secure yet removable. I also found the perfect piece of 4” foam at Joann (RIP) for the cushion, which I cut to size using a bread knife.

Week 5: Cushion Catastrophe and Table Triumph
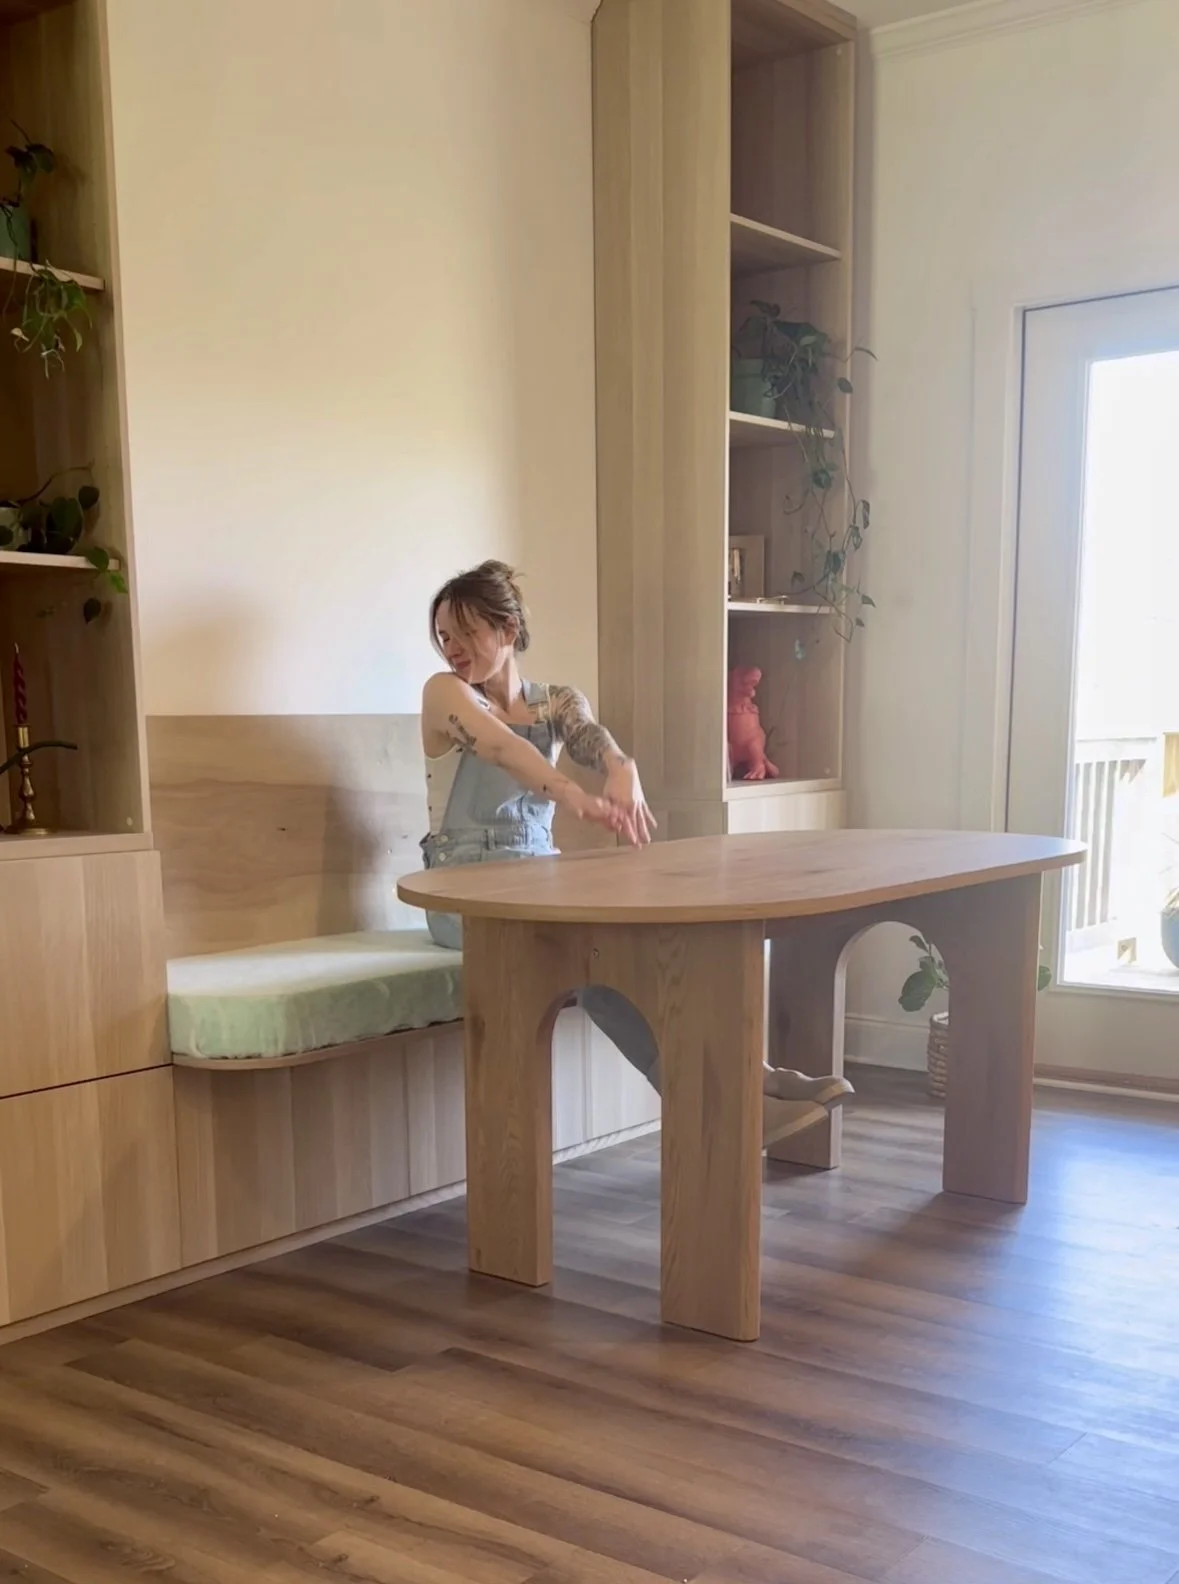
Week 5 had its ups and downs. I attempted to make cushion covers for the built-in bench using beautiful blush pink fabric from Joann. Unfortunately, I didn’t have enough fabric, and the cushion covers didn’t fit as planned. On the bright side, my new Roma 67” Oval Table and Oslo Chairs from Pop Maison arrived. The table’s wood grain and arched legs added elegance, while the green upholstered chairs provided comfort and complemented the room’s palette.
Week 6: Wallpaper Woes and Trim Triumphs
In Week 6, I hung, took down, and rehung the most gorgeous wallpaper. Additionally, I focused on adding trim details to the built-in units, enhancing their custom look. These finishing touches brought the room closer to the envisioned design.
Week 7: DIY Magic and Cushion Redemption
Week 7 was all about cushion redemption. I successfully created a new cushion cover that fit perfectly (thank you curtain panels) bringing comfort and style to the bench seat.
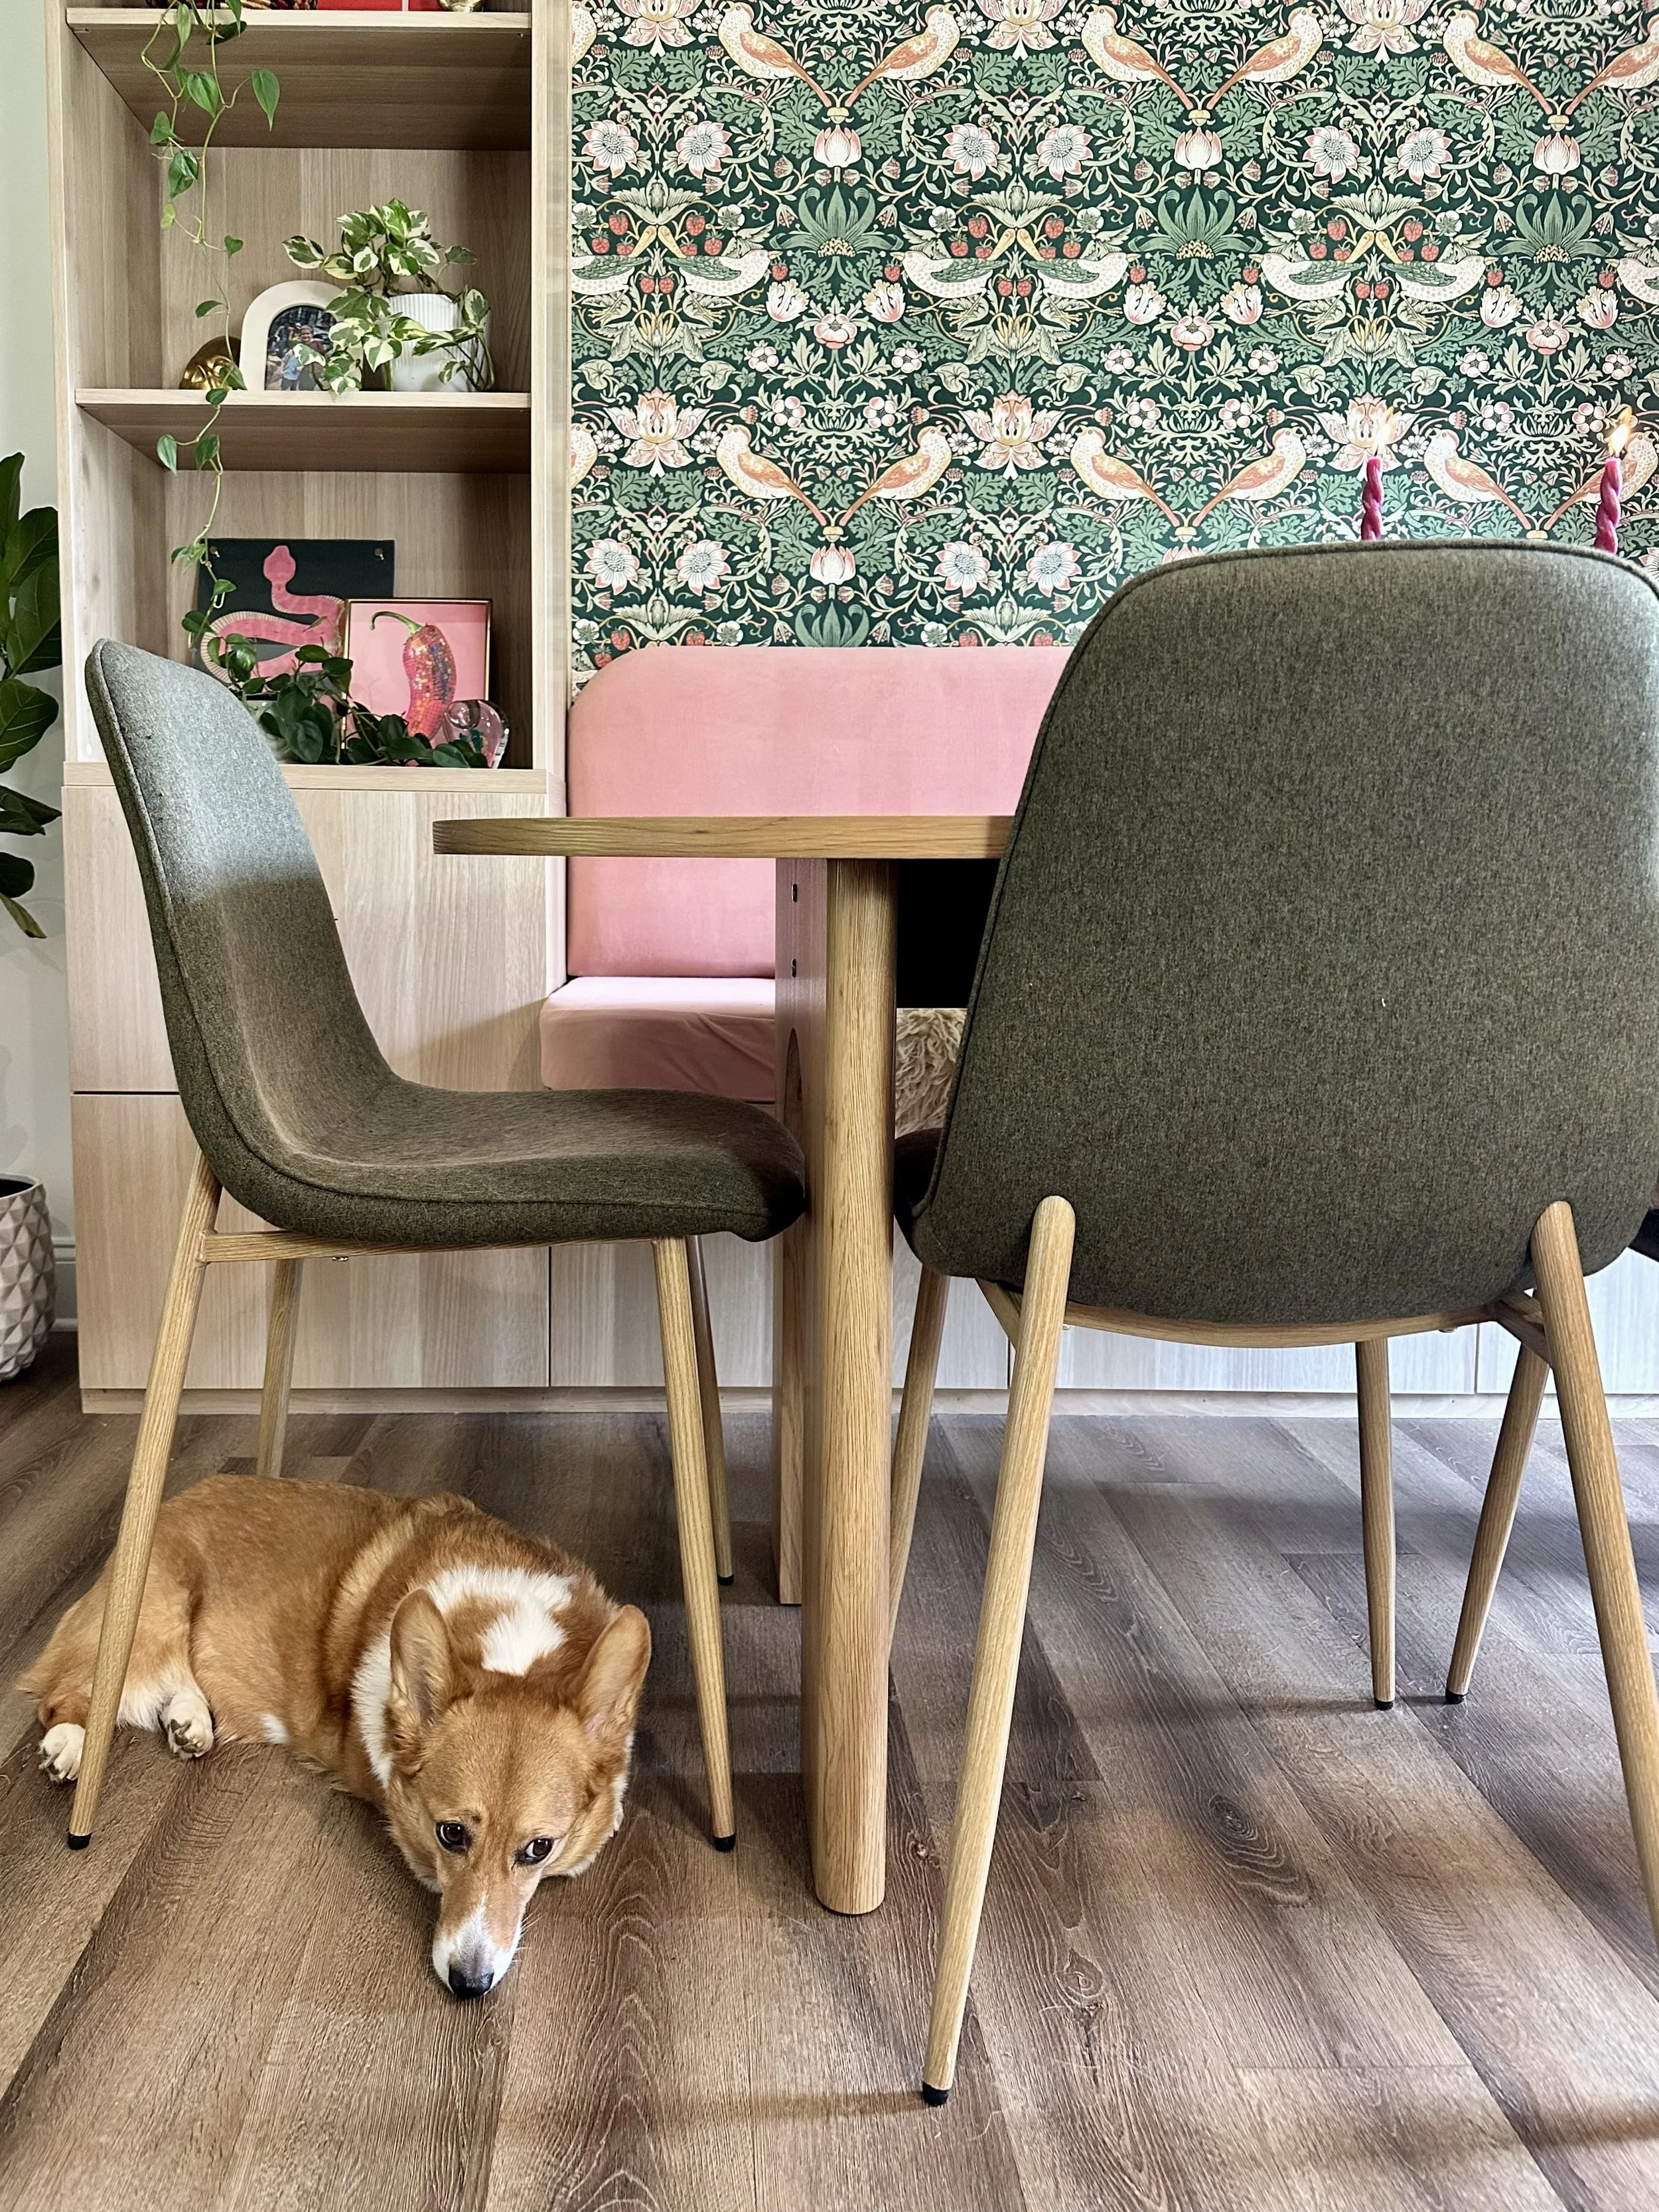
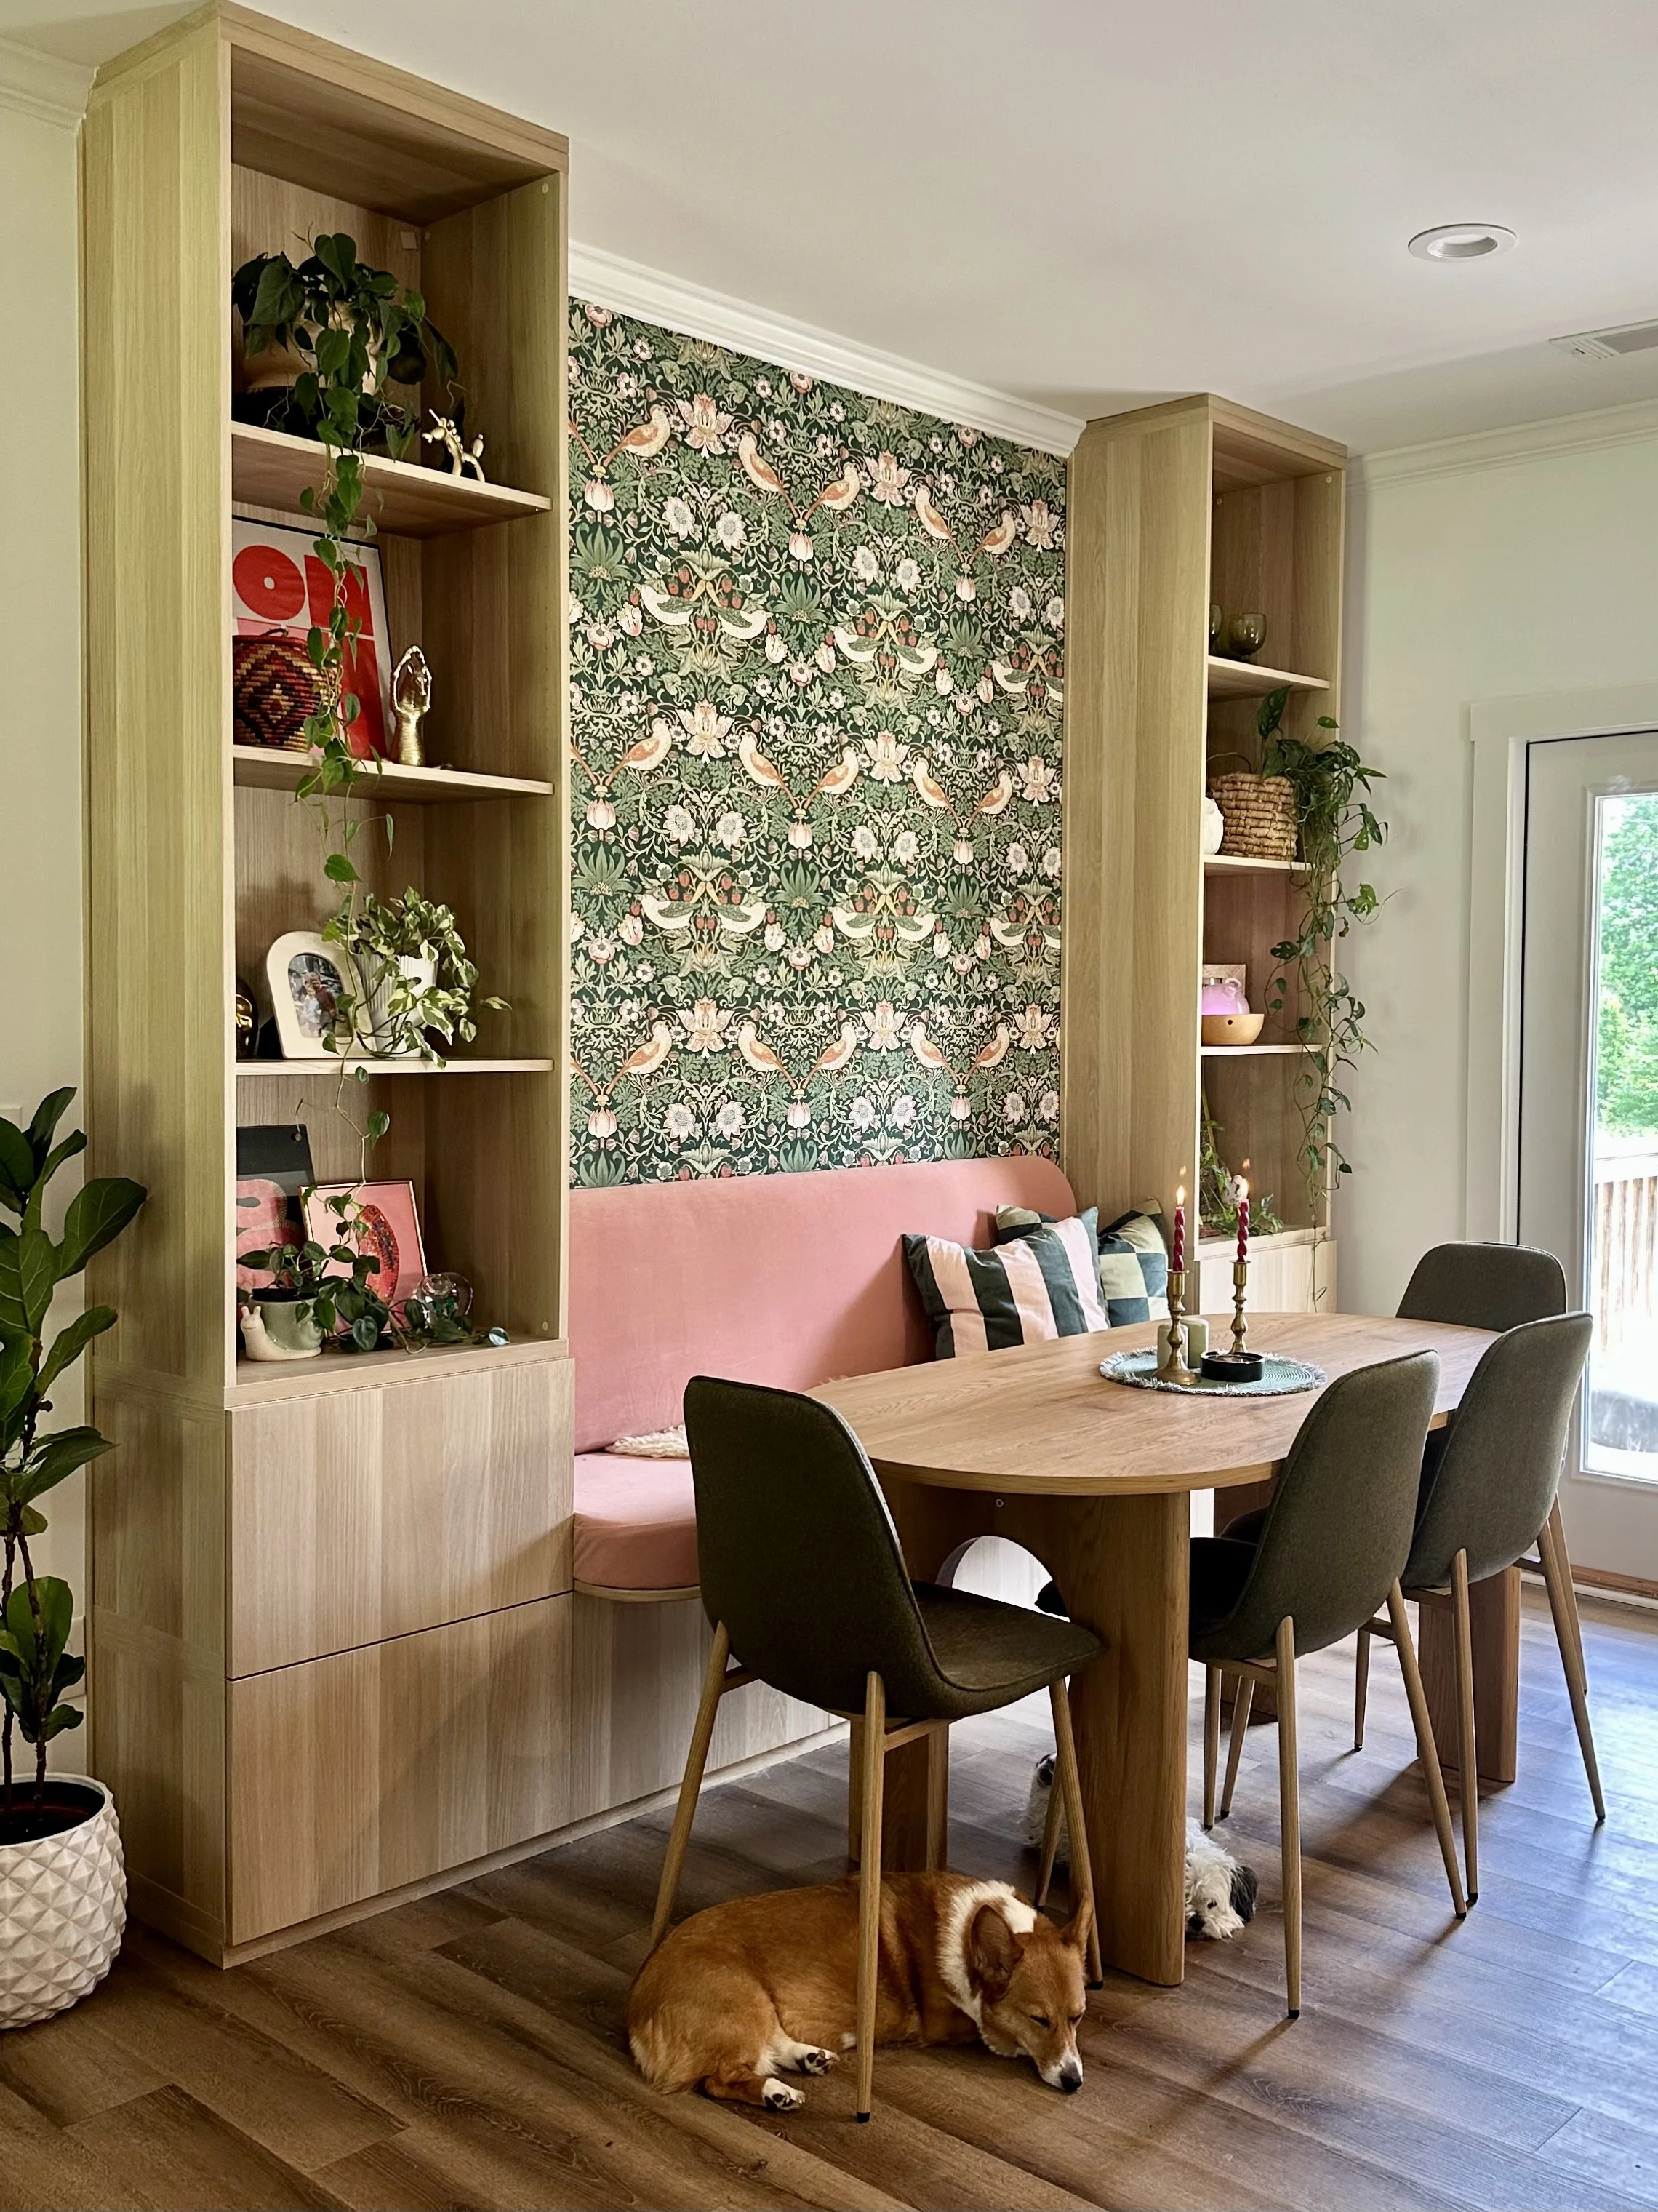
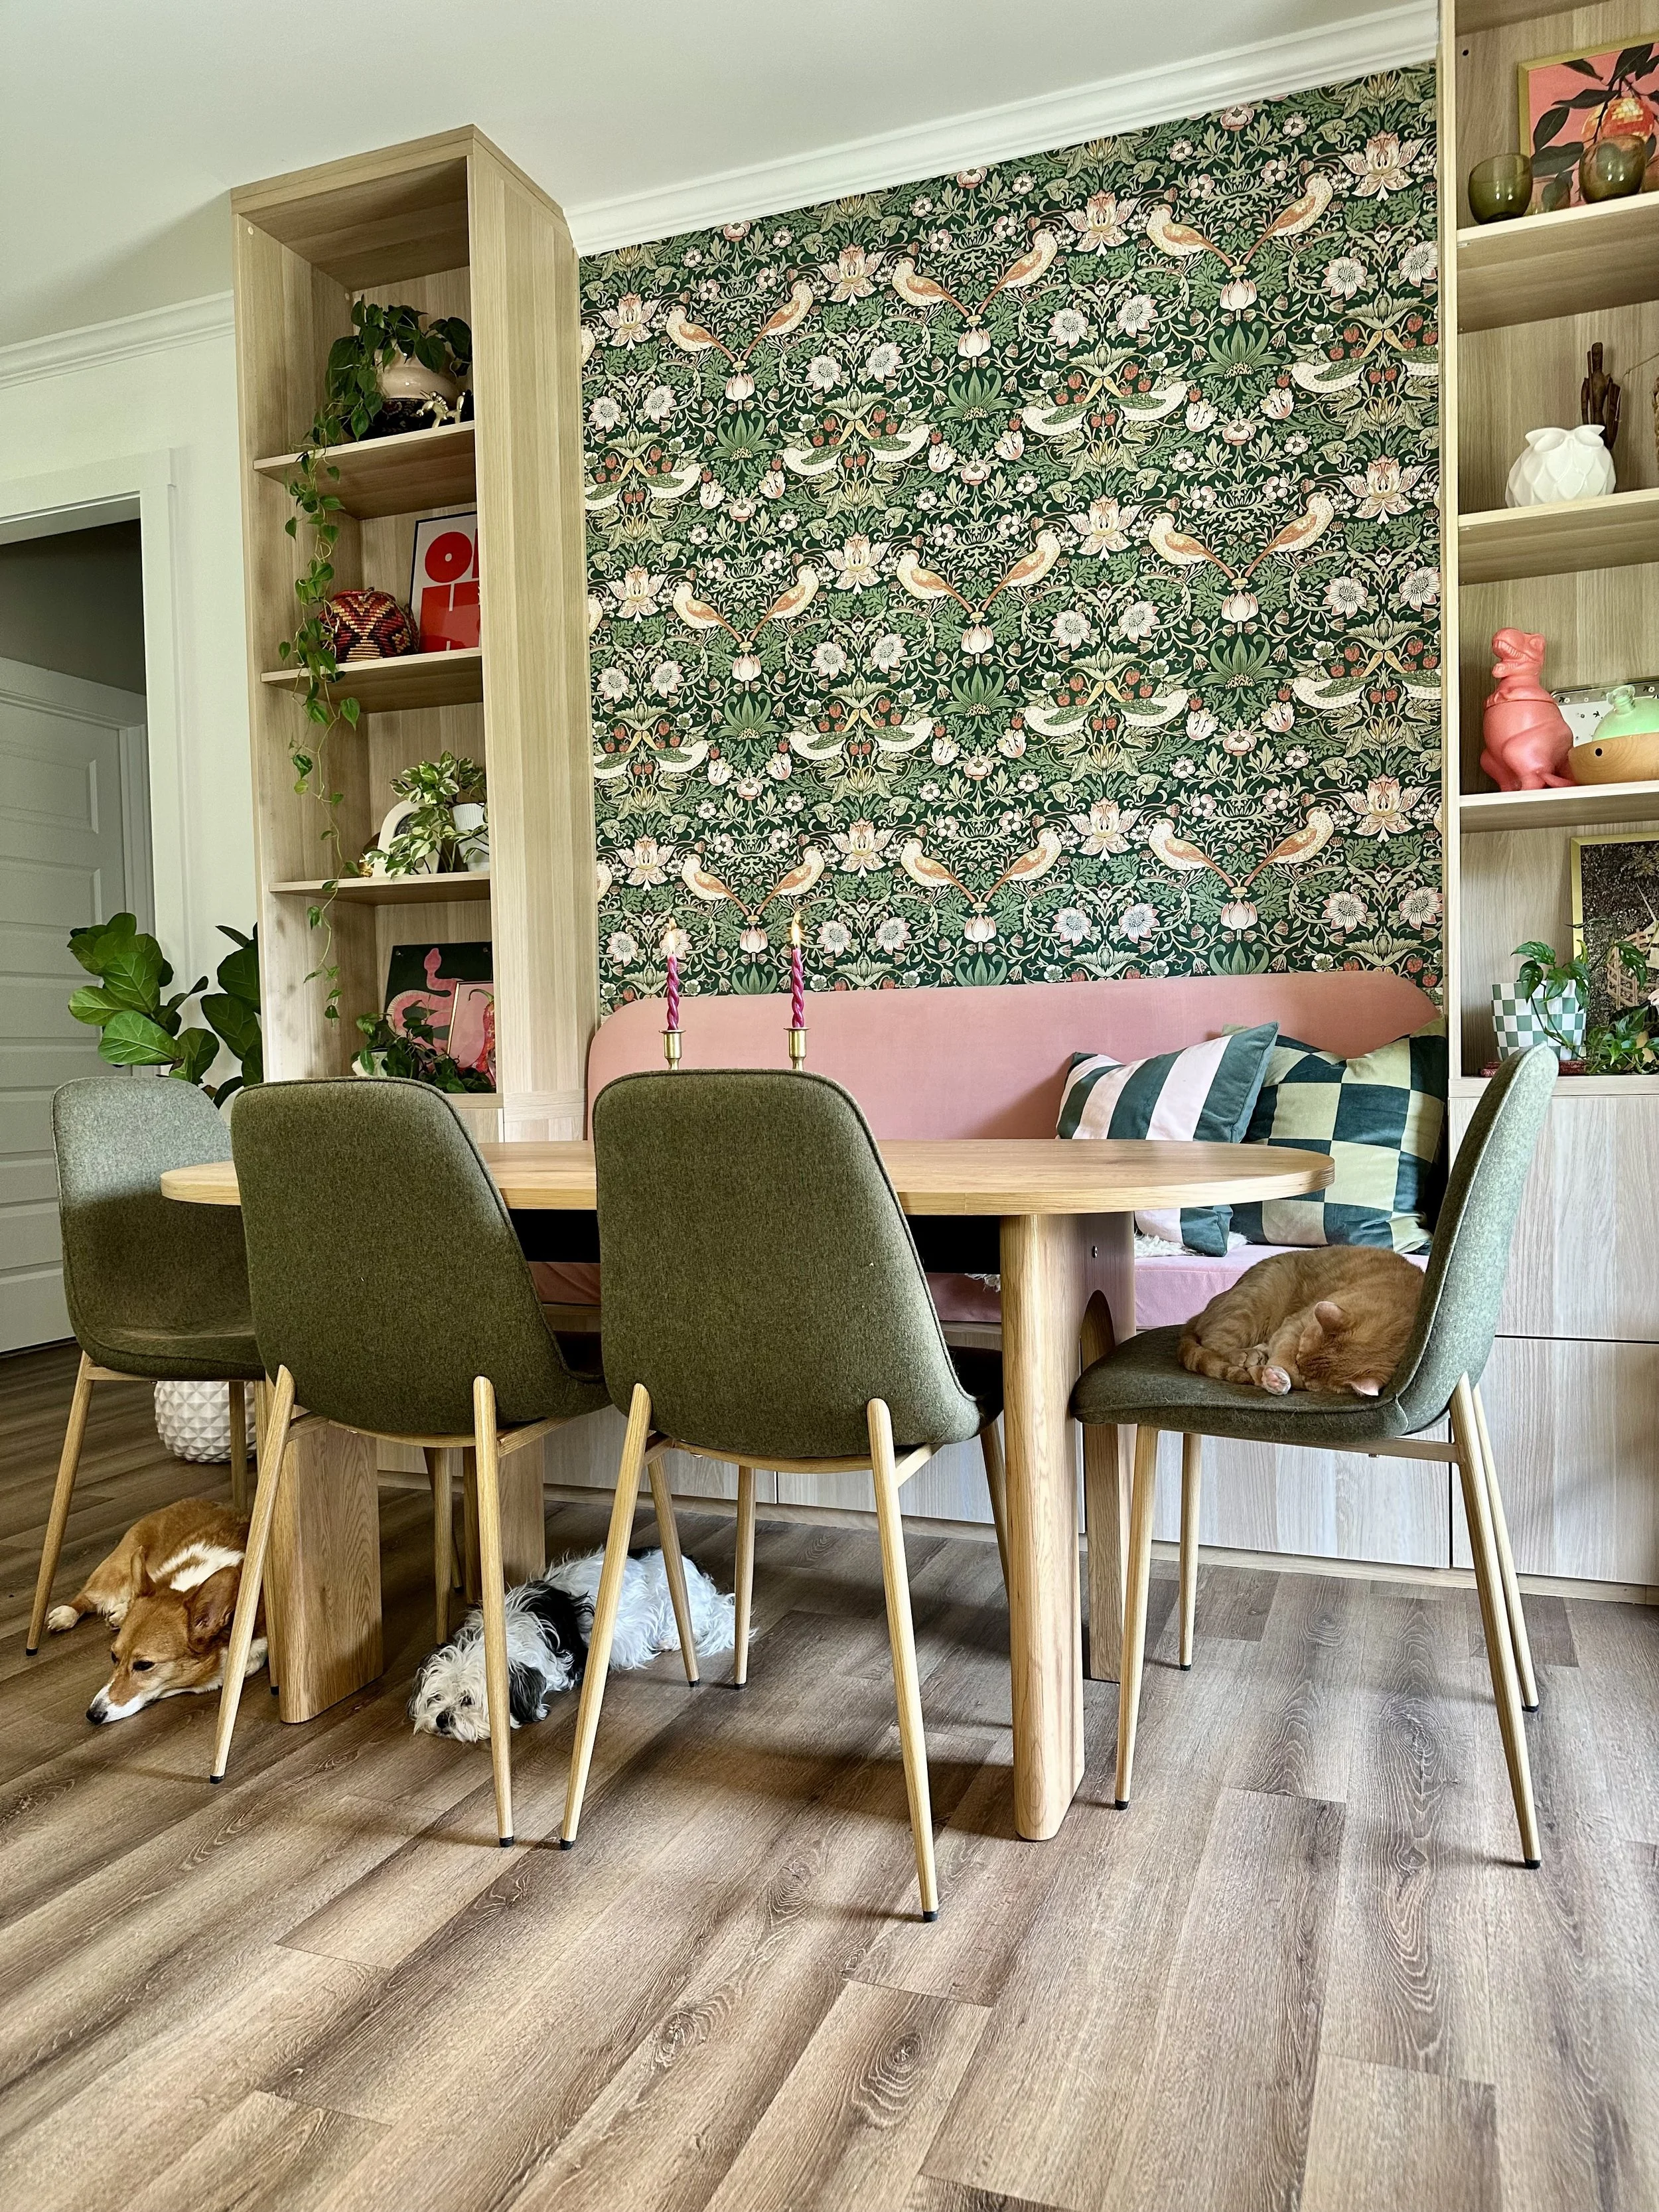
Week 8: The Finishing Touches
This final week was all about those little details that pull the entire space together. I finally had the time (and motivation!) to unpack some more boxes from our move, which led to one of my favorite design moments: shopping our home.
I filled the built-ins with books, plants, collected treasures, and artwork I already had—but hadn’t seen in months. It’s amazing how giving old pieces a new home can breathe life into them. The shelves now feel curated and personal, not staged or stuffy.

I also unearthed boxes full of school supplies, plant accessories, and cookbooks—random, but real life! Thankfully, the cabinets we installed were the perfect solution to keep all of it organized and out of sight. Functional storage that works hard behind closed doors? Yes please.
Final Thoughts
This dining room started out as a pretty uninspired, underutilized space. Now? It feels like the heart of our home. It’s a place where we’ll share meals, homework, projects, and late-night conversations—and that’s exactly what I was hoping for.
Thank you to everyone who followed along during this One Room Challenge. It’s been so encouraging to share this process and see the transformation unfold week by week. I hope this inspires you to tackle a space in your own home that’s been waiting for some love.
Until next project,
Meg 🖤